In this guide, we will build a data pipline that moves data between files. This example is a great to get started with Conduit on a local machine, but it's also the foundation of use cases such as log aggregation.
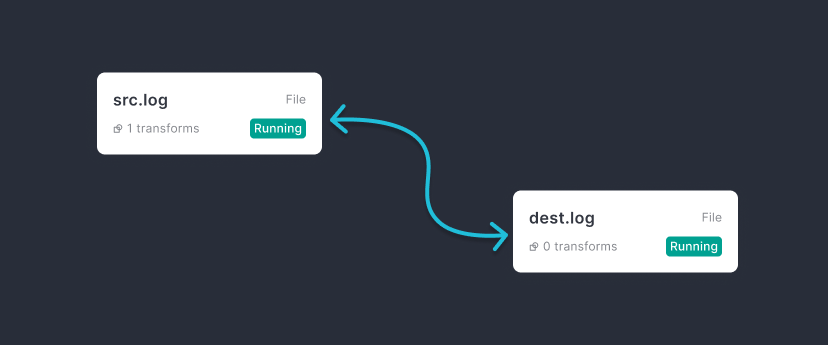
Everytime that data is appended to the src.log, data will be move in real-time to dest.log.
Prerequisites
Before you get started, you'll need an instance of Conduit deployed or running locally.
Creating Local Resources
For this example, we'll create a local directory to hold the source and destination files:
mkdir -p ~/resources
cd ~/resources
touch src.log dest.log
Assemble the pipeline
Now that we have some files, let's build the pipeline.
Make sure you have Conduit running and you can access the Conduit UI.
Using the File Connector
Create a pipeline in the Conduit UI and create a source connector:
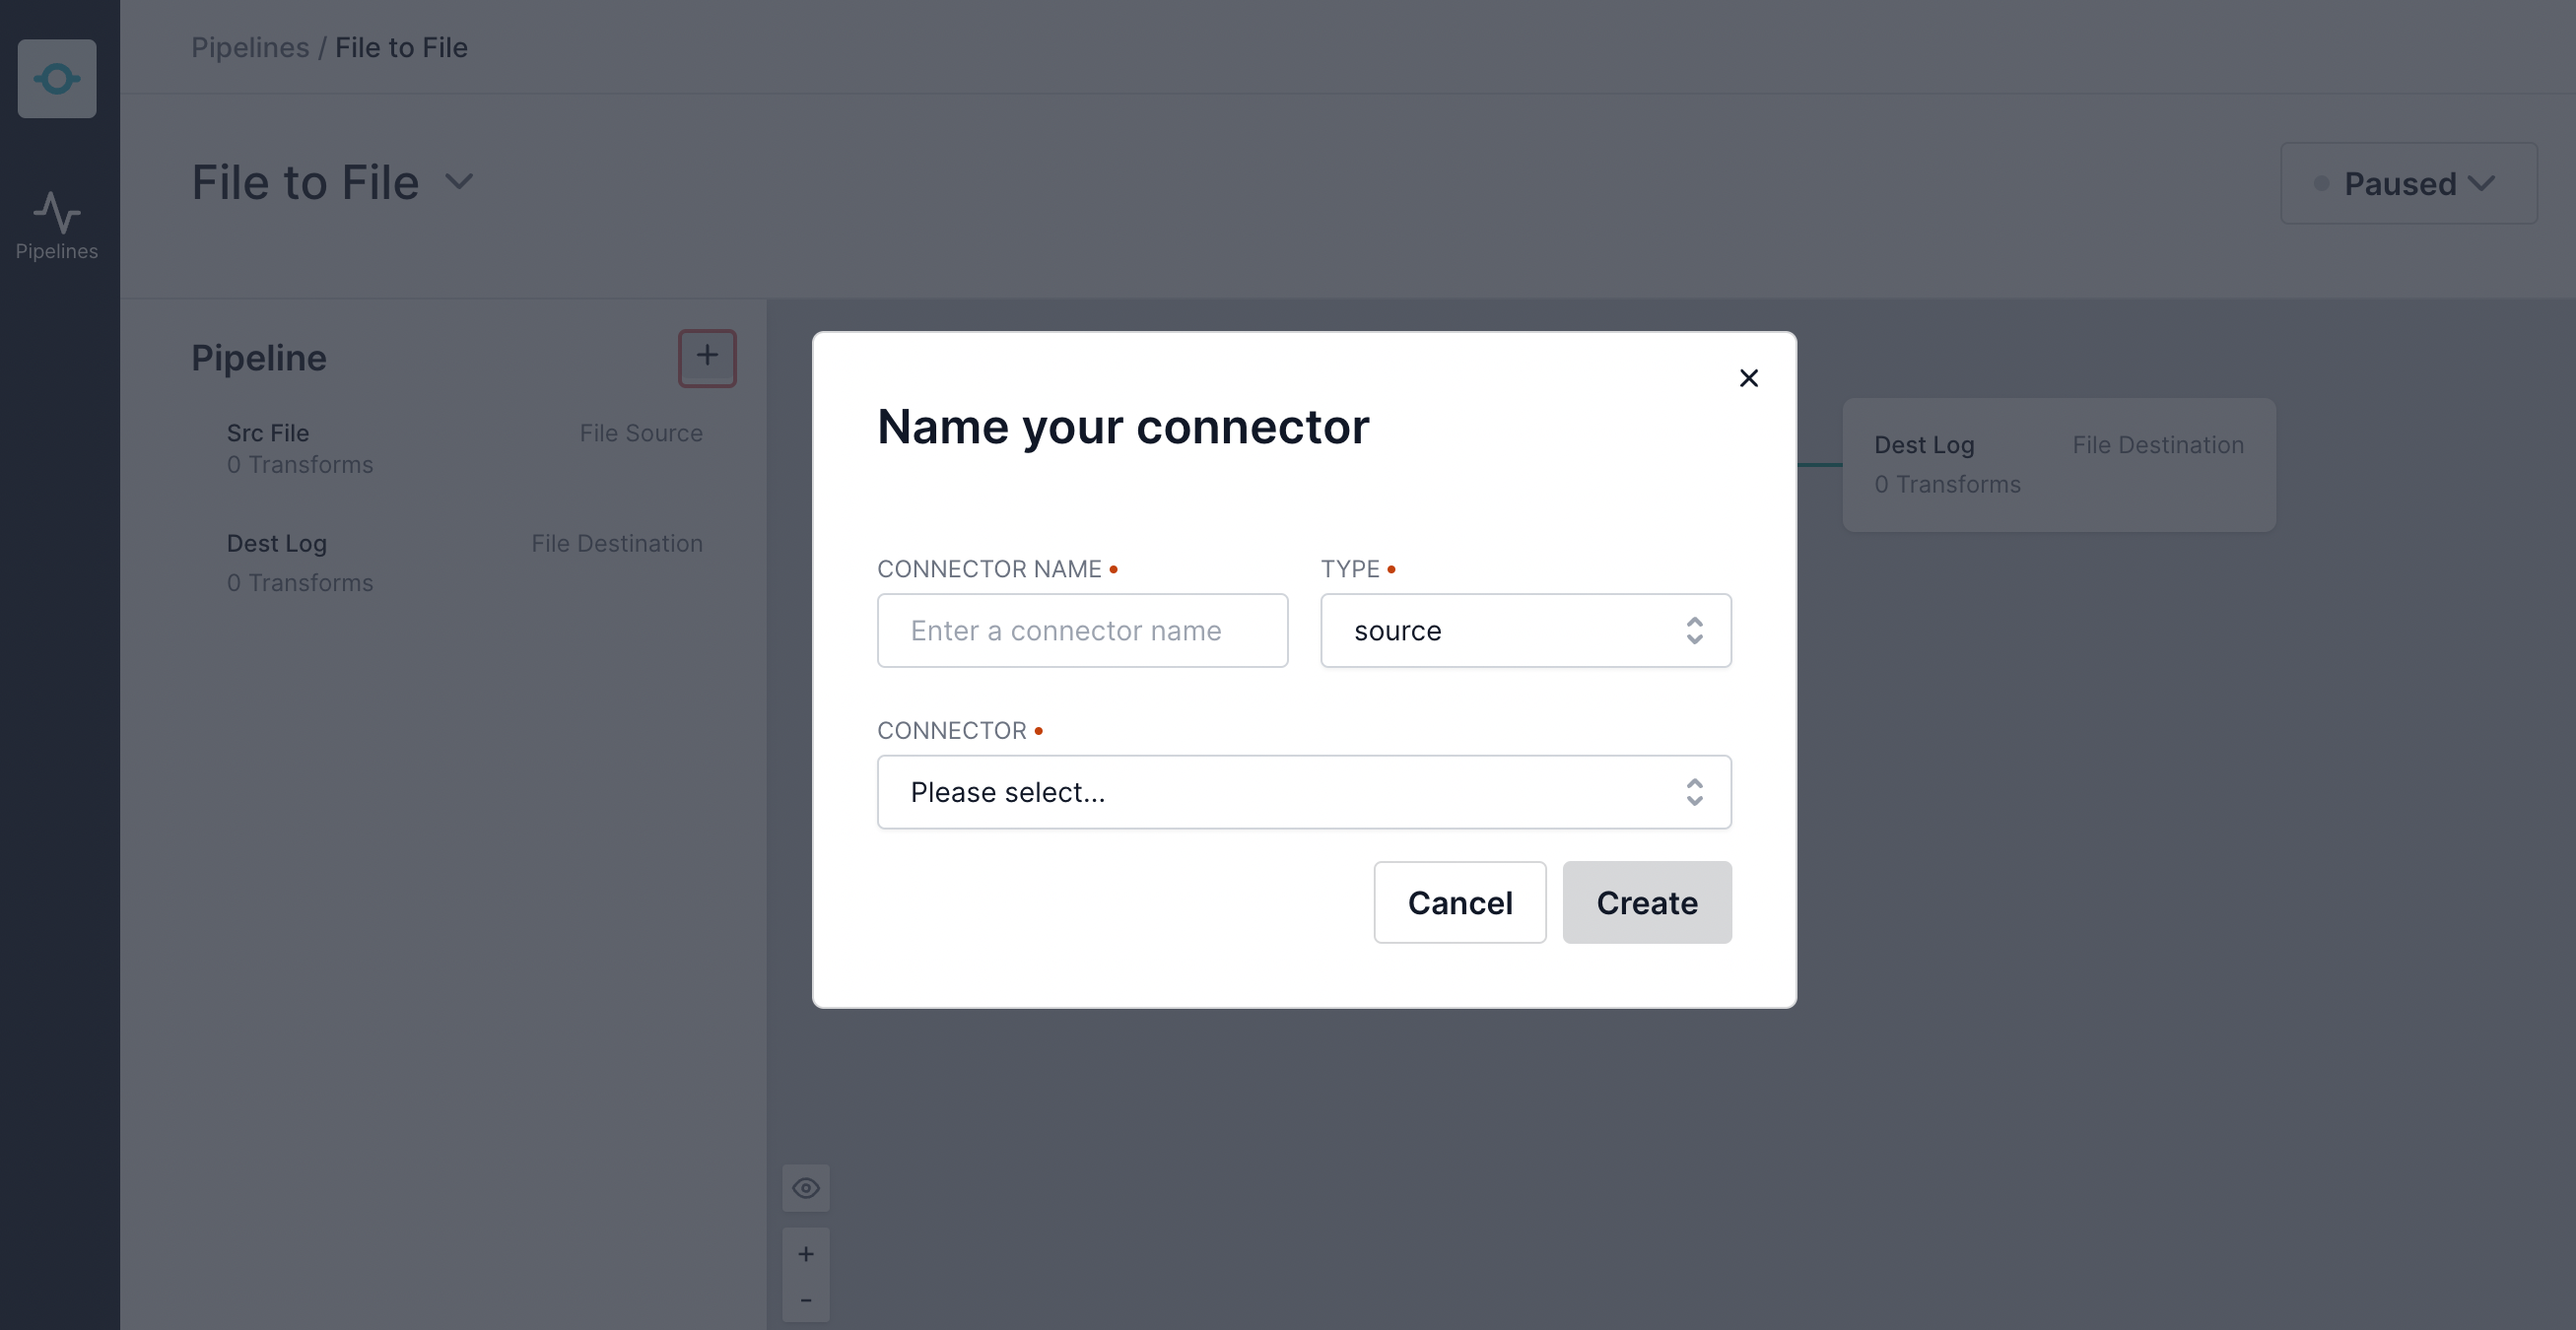
Select "File" as the Connector Type.
The file connector will listen to appends to the src.log and send the data into Conduit. For it's configuration, we'll need to specify the file to read from.
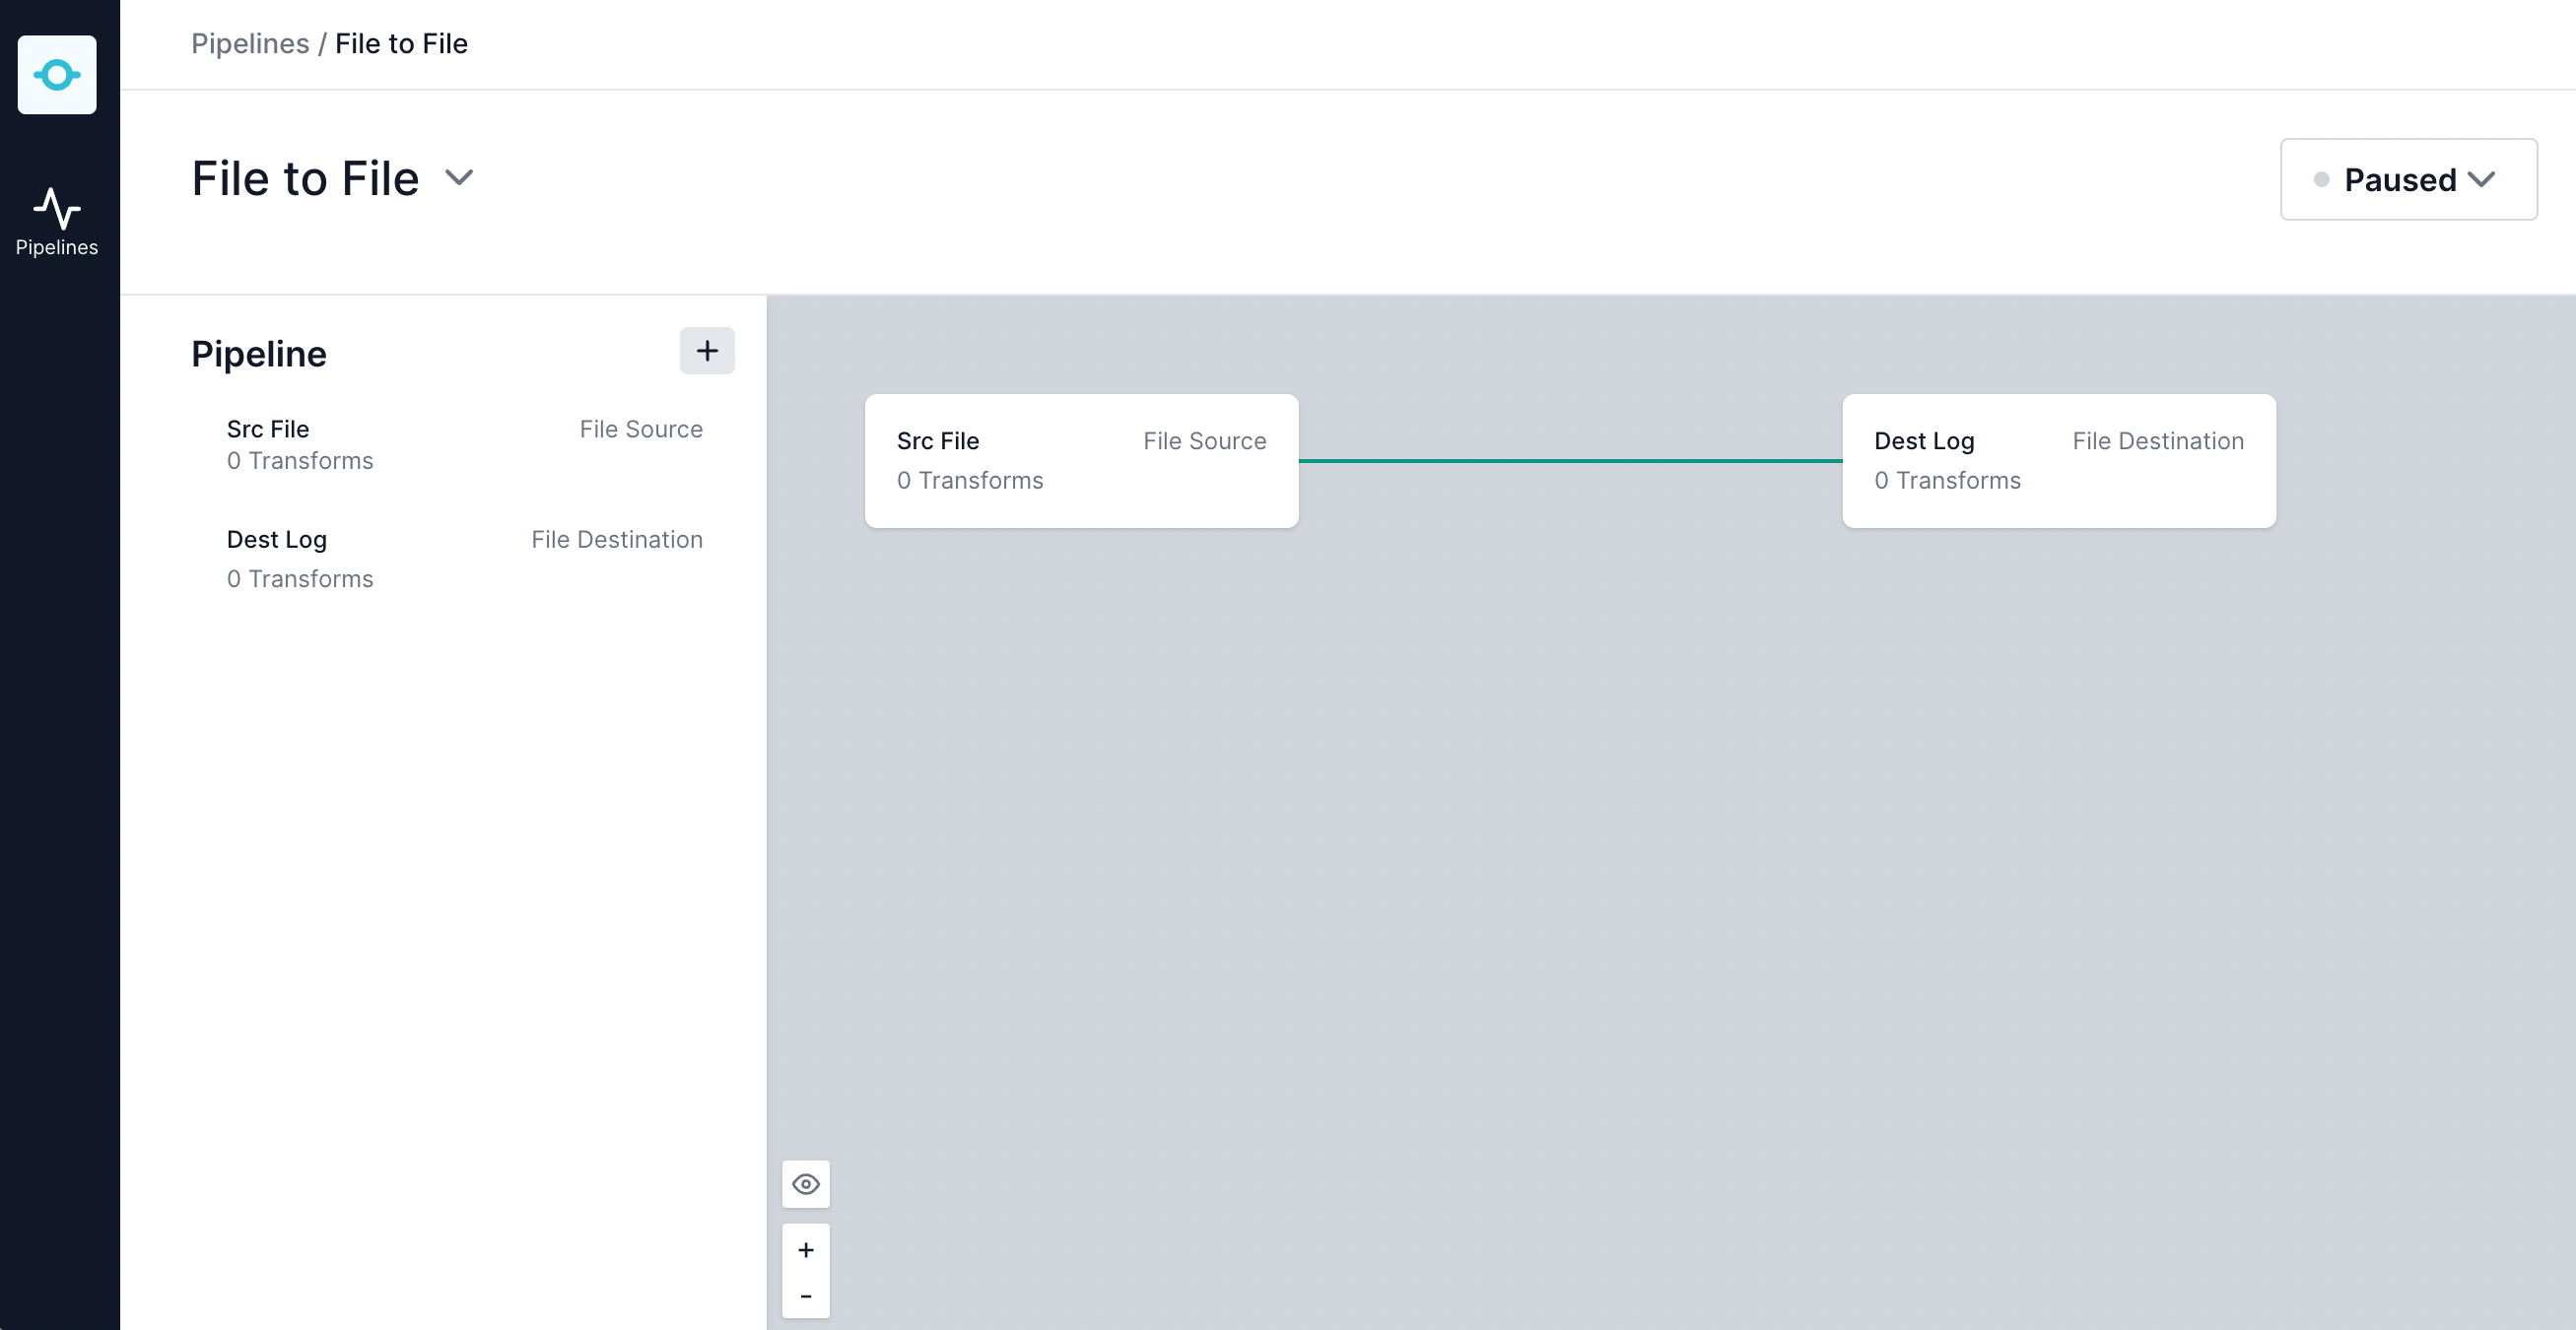
Then, do the same thing for the Destination. Once done, you should see a pipeline that looks like this:
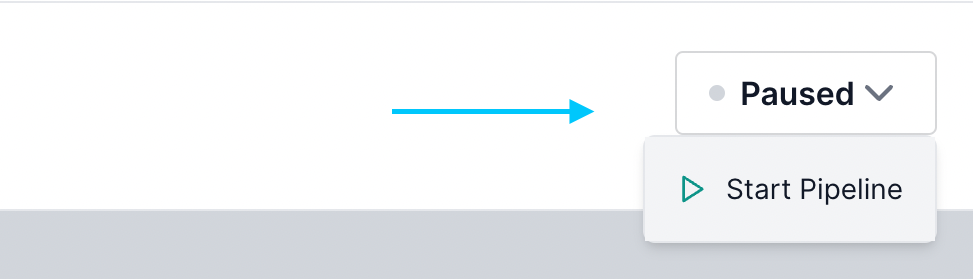
Start the pipeline
Now, it's time to start your pipeline.
To start, click the pipeline status drop-down in the top right and select "Start".
Generating data
To generate data, we need to write some code to generate a log that's updated continuously. Any bit of code that will write to a file on a loop will do.
However, here is an example using the Node.js pino library:
const pino = require('pino')

const transport = pino.transport({
    target: 'pino/file',
    options: { destination: '~/resources/src.log', append: false }
})

const logger = pino(transport)

setInterval(() => {
    logger.info('hello world')
}, 1000)
Once your writing to a file, you should see Conduit immediately start reading them out to dest.log.
We can't wait to see what you build.
Further Resources
Here are some resources to help you continue your journey: