By default, Conduit ships with a REST API that allows you to automate the creation of data pipelines and connectors. To make it easy to get started with the API, we have provided a Swagger UI to visualize and interact with the Condiut without having to write any code...yet 😉.
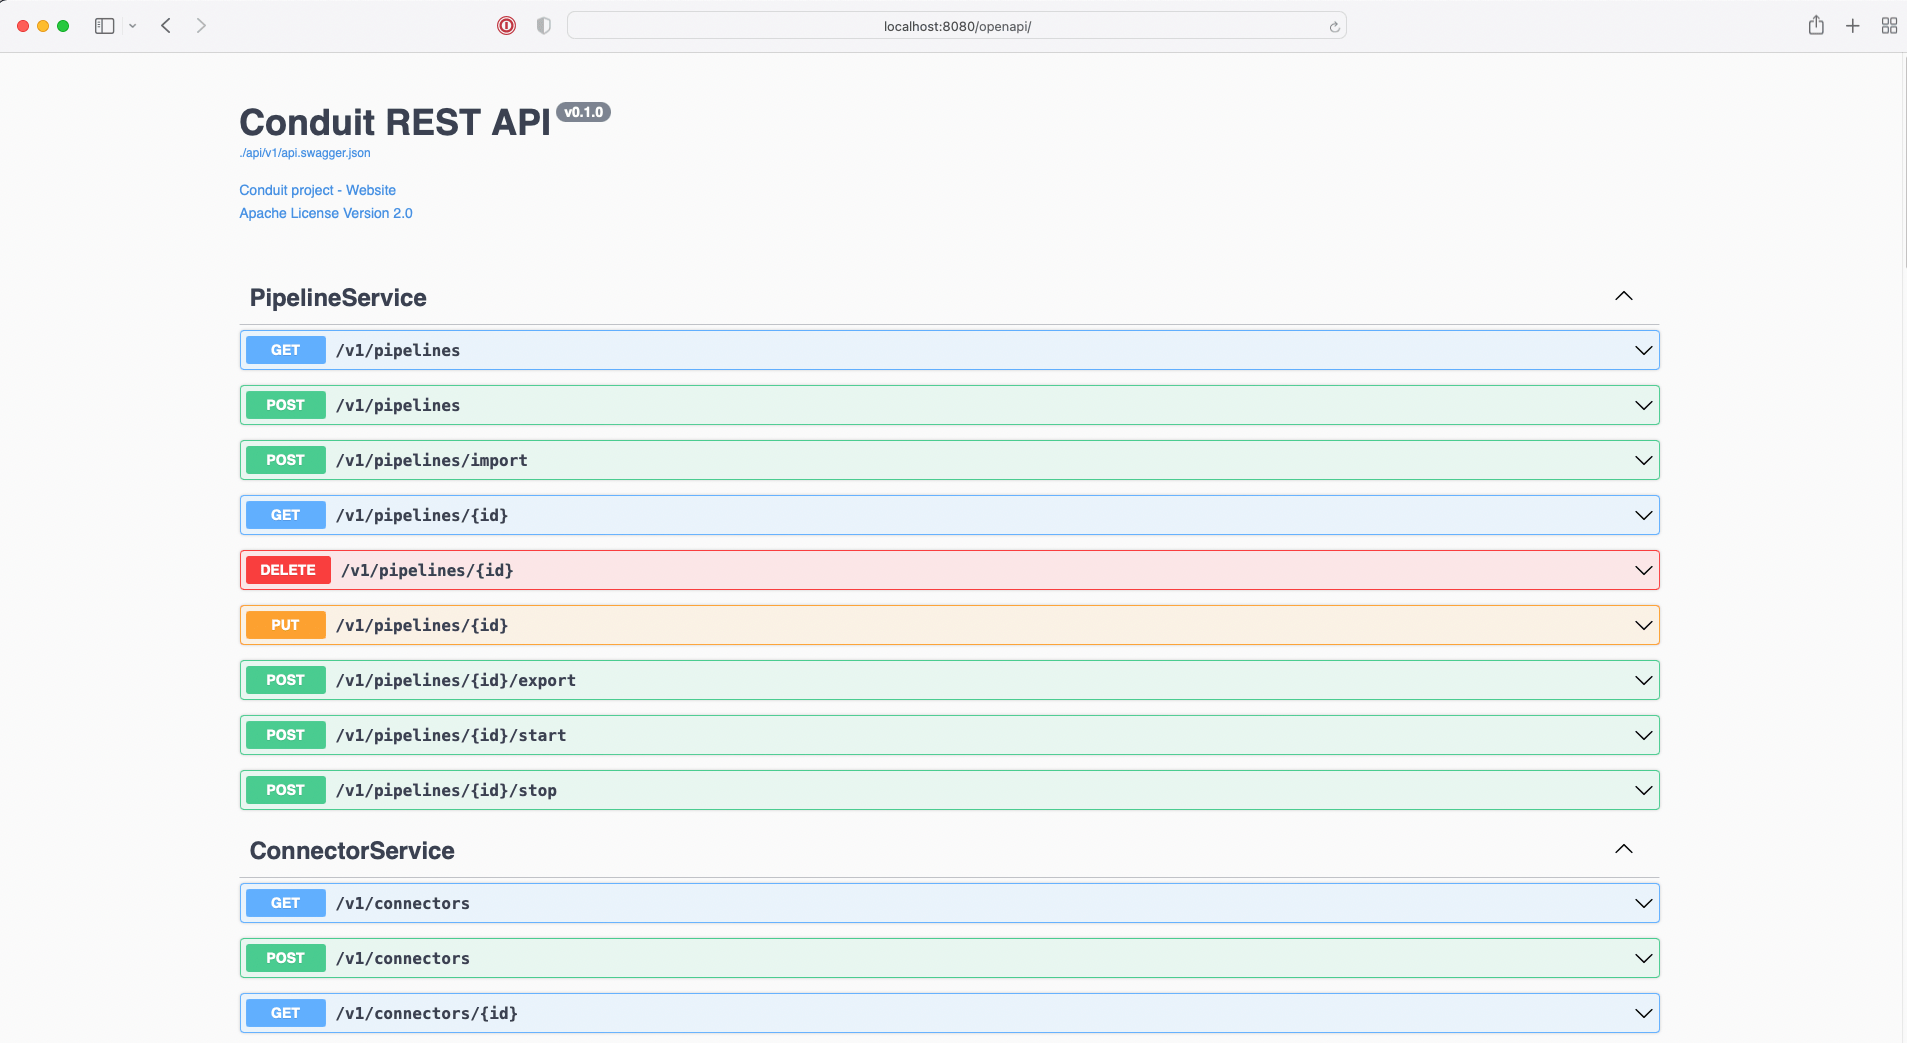
After you start Conduit, if you navigate to http://localhost:8080/openapi/, you will see a page that looks like this:
Then, after you test the API, you can write code to make the equilivent request. For example, here is how you would make a request using the axios Node.js library.
const config = {
    type: 'TYPE_SOURCE',
    plugin: `${pkgPath}/pkg/plugins/pg/pg`,
    pipelineId: pipeline.id,
    config: {
        name: 'pg',
        settings: {
            table: pgTable,
            url: pgUrl,
            cdc: 'false',
        },
    },
}

const response = await axios.post(`http://localhost:8080/v1/connectors`, config)
Esentially, the API is everything you'd need to auomate pipeline creation. Let's begin.
Starting Conduit
To get started, you need to install and start Conduit. You may even add Conduit to your $PATH.
./conduit
To open the Swagger UI, open your browser and navigate to http://localhost:8080/openapi. This UI allows you to interact with the API and create connectors. It also serves as a reference for the API.
Making a Request
The API lets you manage all parts of Conduit. For example, all we need to create and start a pieline are these three APIs:
- Create Pipelines -
POST /v1/pipelines - Create Connectors -
POST /v1/connectors - Start/Stop Pipelines
POST /v1/pipelines/{id}/start
Let's use the Swagger UI to create a pipeline.
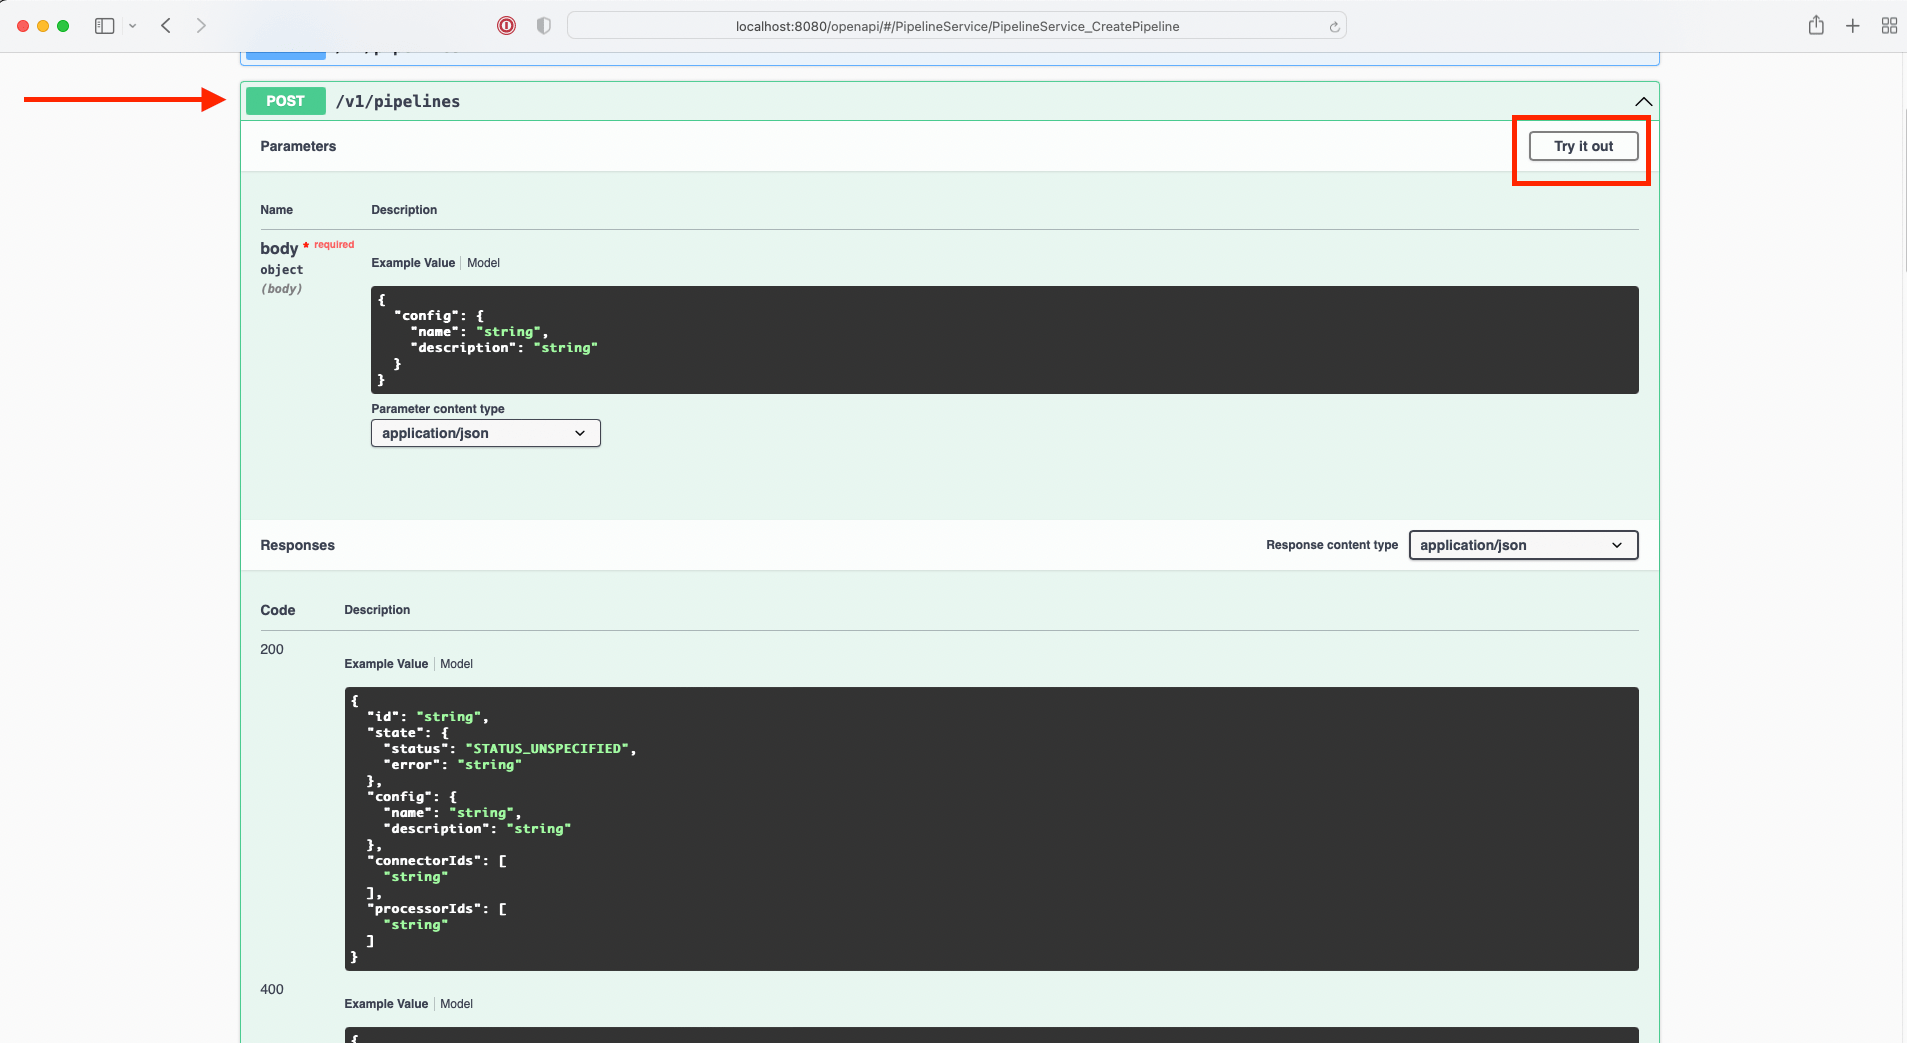
- First, find the create pipeline API, and select "Try it out":
- Update the
bodyof the request with your new pipeline details:
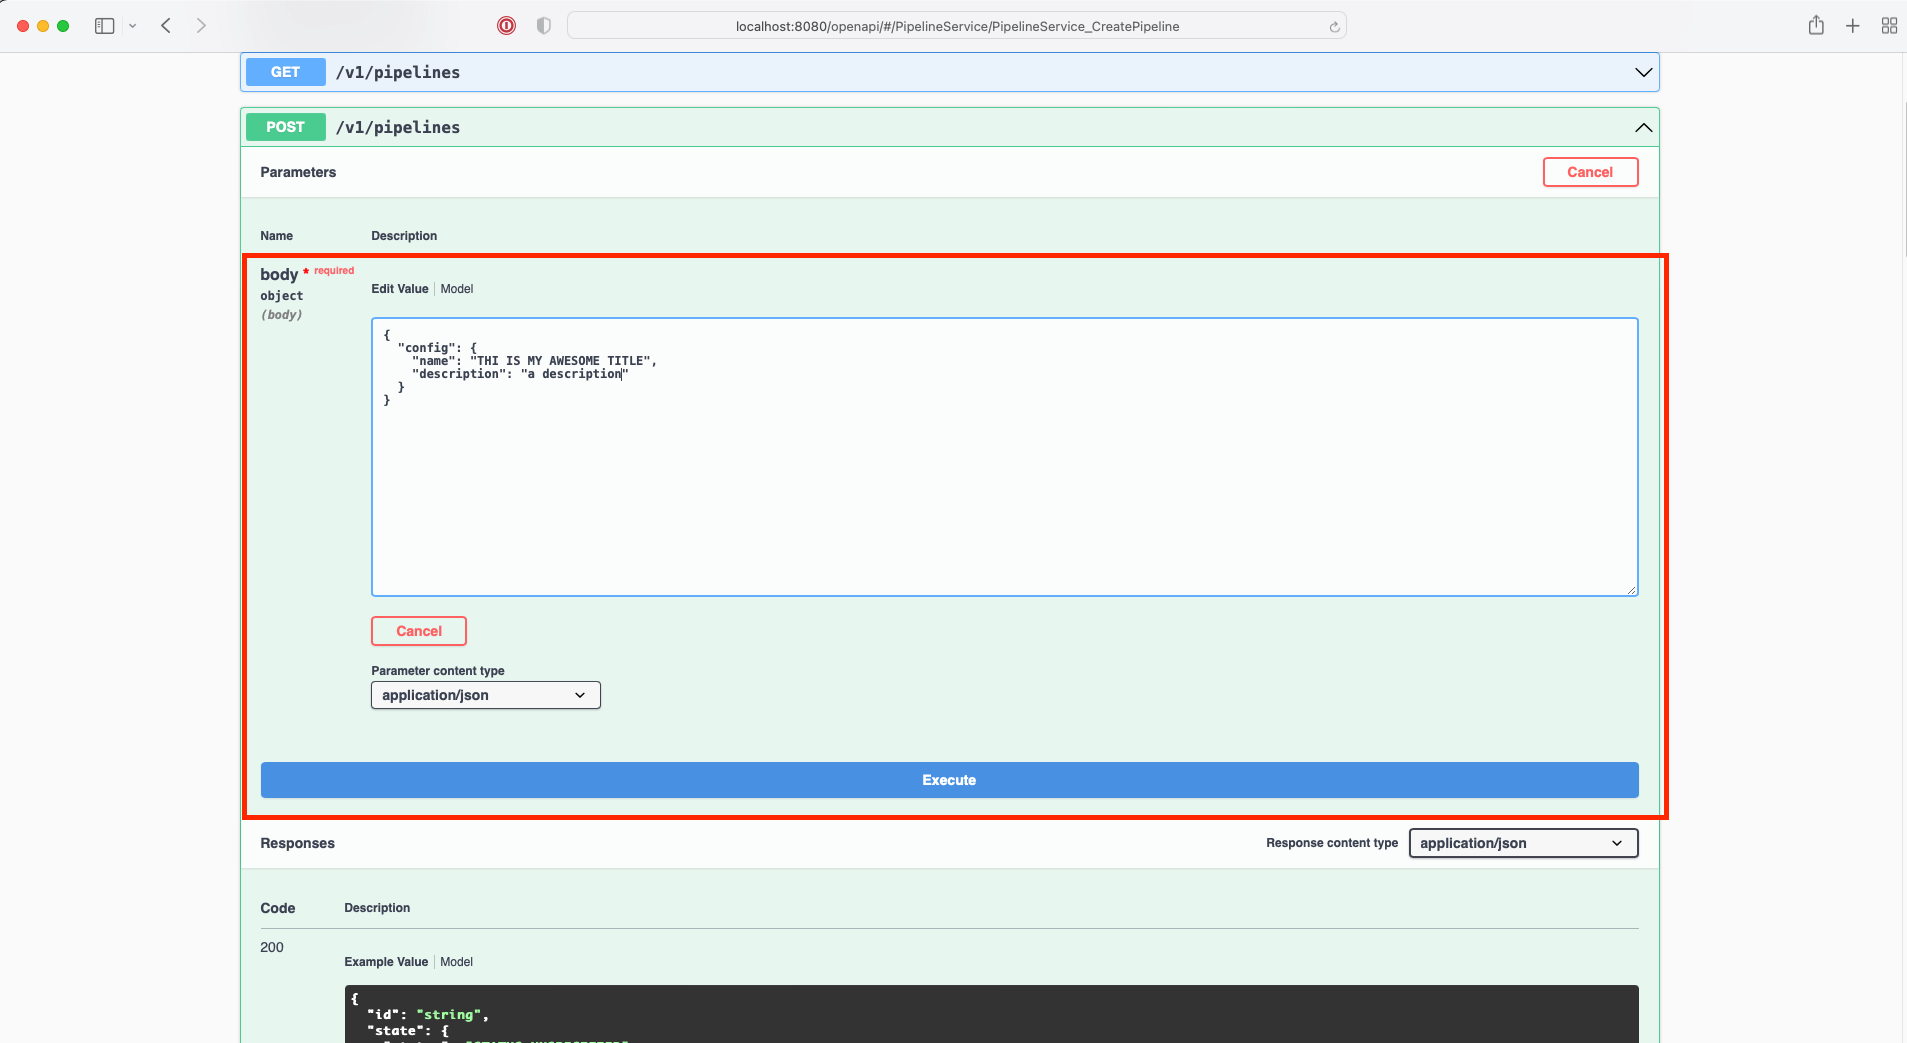
In this case, the config describes the name and the description of the new pipeline:
{
    "config": {
        "name": "string",
        "description": "string"
    }
}
- Select "Execute", notice the
responseof the request:
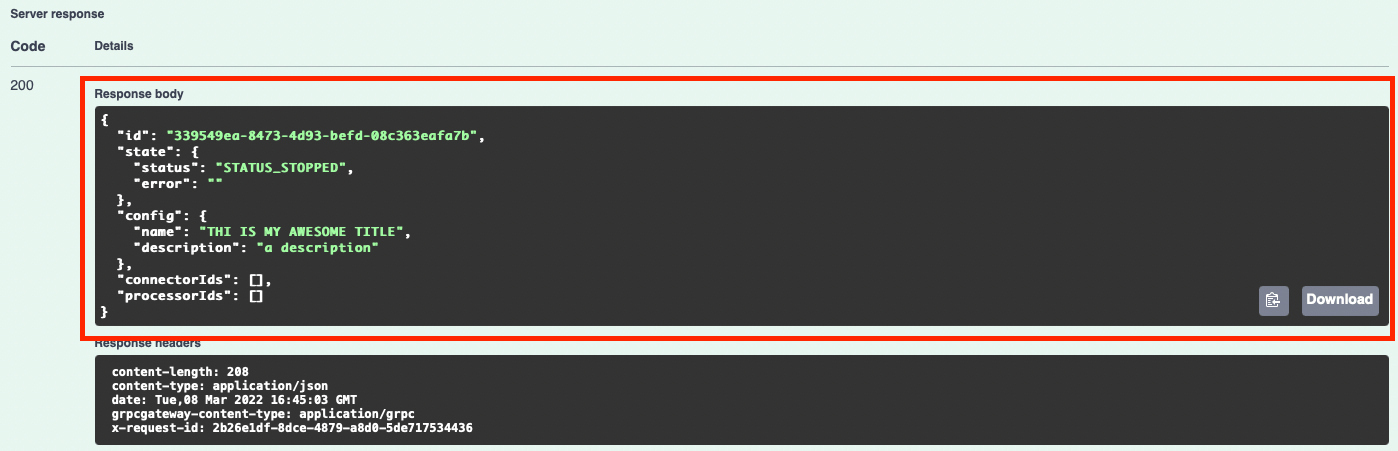
For every request, you will be able to try it out, see the body of the request, and the expected response.
What's Next
Now that you know how to try out the API, you can explore Conduit with these other resources: